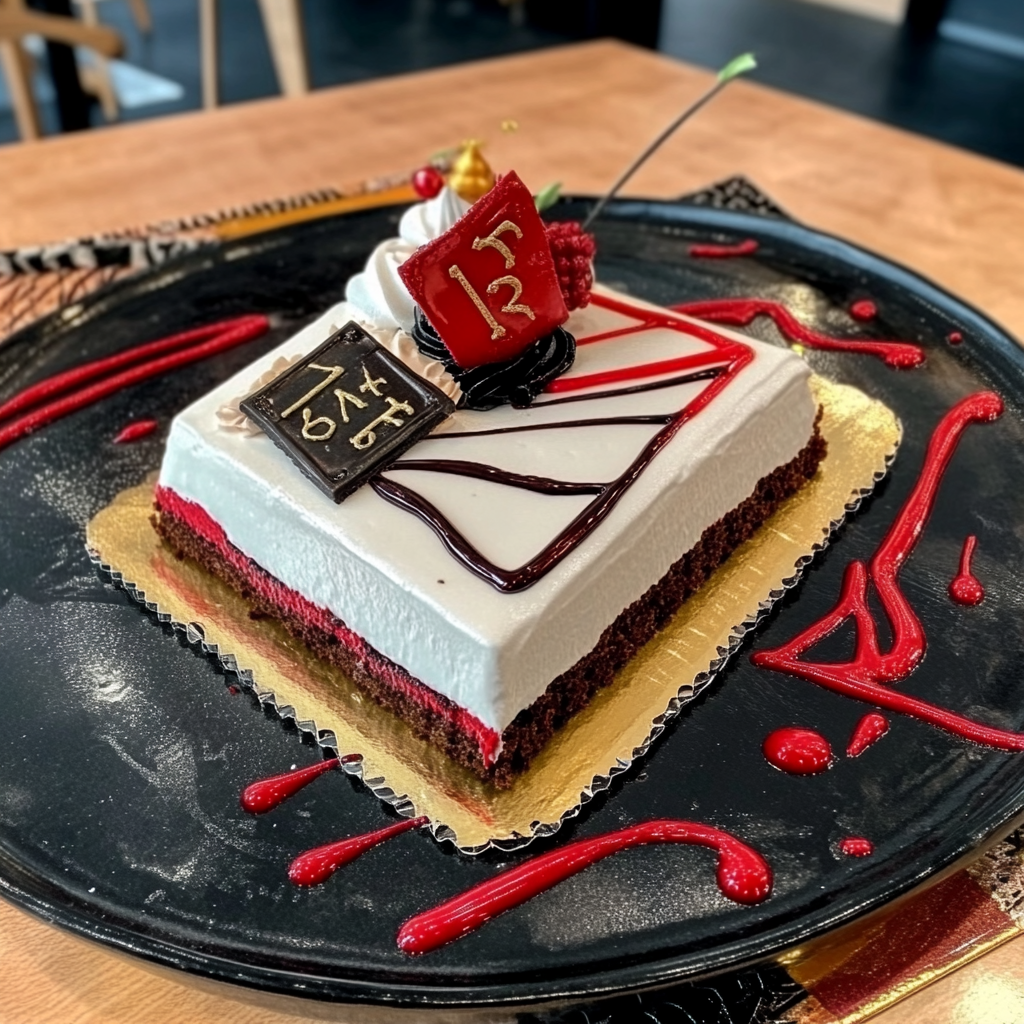
Graduation season is upon us, and what better way to celebrate than with a Year-by-Year Graduation Cake? Imagine layers of fluffy cake, rich frosting, and colorful decorations that tell the story of each year. This cake isn’t just a treat; it’s a delicious timeline of achievements, friendships, and unforgettable moments. For more inspiration, check out this Irresistible Caramel Carrot Cake recipe.
Jump to:
- <strong>Essential Ingredients</strong>
- <strong>Let’s Make it together</strong>
- <strong>Perfecting the Cooking Process</strong>
- <strong>Add Your Touch</strong>
- <strong>Storing & Reheating</strong>
- <strong>FAQ</strong>
- What is a Year-by-Year Graduation Cake?
- How can I decorate my Year-by-Year Graduation Cake?
- Can I make this cake ahead of time?
- 📖 Recipe Card
Picture this: the aroma of fresh cake wafts through your kitchen as you prepare to create a masterpiece that will have everyone reminiscing about their school days. A Year-by-Year Graduation Cake is perfect for graduation parties, family gatherings, or any occasion that calls for celebration and nostalgia.
Why You'll Love This Recipe
- This Year-by-Year Graduation Cake combines delightful flavors with simple preparation steps
- It visually represents milestones, making it the centerpiece of any graduation celebration
- Enjoy the flexibility to customize each layer based on favorite flavors or colors
- It’s not just a cake; it’s a heartfelt tribute to accomplishments!
I remember the time my cousin graduated; we made this cake together, and everyone had tears in their eyes—partly from laughter and partly from joy!
Essential Ingredients
Here’s what you’ll need to make this delicious dish:
- Cake Flour: The key to light and fluffy layers; sift it well for best results.
- Baking Powder: Essential for rising; ensure it’s fresh for maximum fluffiness.
- Sugar: Granulated sugar sweetens the layers perfectly; don’t skimp on this one! sweet potato cinnamon muffins.
- Butter: Use unsalted butter for better control of sweetness; it adds richness.
- Eggs: They provide structure; room temperature eggs mix better into the batter.
- Milk: Whole milk keeps the cake moist; substitute with buttermilk for extra flavor.
- Vanilla Extract: Adds depth and warmth; always use pure extract if possible.
- Food Coloring: Opt for gel colors to brighten up your cake layers without altering texture.
- Frosting (your choice): Buttercream works wonders here; it can be flavored or colored as desired.
- Decorative Toppers: Get creative with caps, diplomas, or edible glitter to celebrate graduation!
The full ingredients list, including measurements, is provided in the recipe card directly below. creamy pineapple coconut dessert.
Let’s Make it together
Prepare Your Baking Pans: Preheat your oven to 350°F (175°C). Grease your round cake pans with butter and lightly dust with flour to prevent sticking.
Create the Batter: In a large bowl, cream together softened butter and sugar until light and fluffy. Add eggs one at a time, mixing well after each addition.
Add Dry Ingredients: In another bowl, whisk together flour and baking powder. Gradually add it to the wet mixture while alternating with milk until well combined.
Color Your Layers: Divide the batter into separate bowls based on how many colors you want. Add food coloring to achieve vibrant shades for each layer.
Bake Those Layers: Pour each colored batter into prepared pans. Bake in preheated oven for 25-30 minutes or until a toothpick inserted comes out clean.
Cool and Frost: Allow cakes to cool completely before removing them from pans. Frost between layers with buttercream frosting before stacking them high!
Now you have a stunning Year-by-Year Graduation Cake ready to impress! Just remember to take loads of pictures because this beauty deserves its moment in the spotlight!
You Must Know
- The Year-by-Year Graduation Cake is not just a treat; it symbolizes growth and achievement
- Each layer represents a year of hard work, making every bite a celebration
- Vibrant colors and decadent flavors make it the showstopper at any graduation party
Perfecting the Cooking Process
Start by baking each layer separately, allowing them to cool completely before stacking. delightful lemon tart meringue This ensures stability and prevents any cake disasters when it’s time to assemble. mini kunafa cream puffs.
Add Your Touch
Consider adding different flavors for each layer, like lemon, chocolate, or red velvet. This will keep the taste exciting and allow you to personalize it for the graduate’s preferences.
Storing & Reheating
Store your layered cake in an airtight container in the fridge for up to five days. If you need to freeze it, wrap each layer tightly in plastic wrap.
Chef's Helpful Tips
- For a stunning finish, use a serrated knife to level your layers perfectly
- Keep your frosting at room temperature for easy spreading, and don’t rush the cooling process—patience pays off with layered cakes!
The first time I made this cake was for my sister’s graduation, and let me tell you: I may have cried more than she did! Watching her face light up when she saw that towering confection was priceless.
FAQ
What is a Year-by-Year Graduation Cake?
It’s a multi-layer cake representing each year of academic achievement.
How can I decorate my Year-by-Year Graduation Cake?
Use colorful frosting, fresh flowers, or themed toppers that reflect the graduate’s personality.
Can I make this cake ahead of time?
Absolutely! Bake layers ahead and assemble closer to the celebration for freshness.
Did You Enjoy Making This Recipe? Please rate this recipe with ⭐⭐⭐⭐⭐ or leave a comment.
📖 Recipe Card
Print
Year-by-Year Graduation Cake
- Total Time: 50 minutes
- Yield: Approximately 12 servings 1x
Description
Celebrate achievements with a delightful Year-by-Year Graduation Cake! This stunning, multi-layered cake is not only a visual masterpiece but also a delicious tribute to the graduate’s journey. Each colorful layer represents a year filled with memories, making it the perfect centerpiece for graduation parties. With simple ingredients and easy-to-follow steps, you can create a cake that brings everyone together to reminisce and celebrate.
Ingredients
- 2 ½ cups cake flour
- 2 ½ tsp baking powder
- 1 ½ cups granulated sugar
- ¾ cup unsalted butter, softened
- 5 large eggs (room temperature)
- 1 cup whole milk (or buttermilk)
- 2 tsp pure vanilla extract
- Gel food coloring (as desired)
- Buttercream frosting (for layering and decorating)
- Decorative toppers (optional)
Instructions
- Preheat oven to 350°F (175°C). Grease and flour round cake pans.
- In a large bowl, cream butter and sugar until light and fluffy. Add eggs one at a time, mixing well after each addition.
- In another bowl, whisk together cake flour and baking powder. Gradually mix into the wet ingredients alternating with milk until fully combined.
- Divide batter into bowls based on the number of colors desired; add gel food coloring to achieve vibrant shades.
- Pour each colored batter into prepared pans and bake for 25-30 minutes or until a toothpick comes out clean.
- Allow cakes to cool completely before frosting between layers with buttercream and stacking them high.
- Prep Time: 20 minutes
- Cook Time: 30 minutes
- Category: Dessert
- Method: Baking
- Cuisine: American
Nutrition
- Serving Size: 1 slice (~100g)
- Calories: 370
- Sugar: 35g
- Sodium: 180mg
- Fat: 18g
- Saturated Fat: 11g
- Unsaturated Fat: 6g
- Trans Fat: 0g
- Carbohydrates: 52g
- Fiber: 0g
- Protein: 4g
- Cholesterol: 90mg

